

Logo Design Online Free 3d
Create an animated 3D logo for your site
There are several ways to create 3D animation on the web, most of them requiring a good knowledge of JavaScript and WebGL, or the use of a plug-in like Flash. Thanks to CSS 3D transforms, it's possible to create 3D using only HTML and CSS, but it isn't easy to do so. Tridiv, my free online app, simplifies the process, offering a simple and intuitive WYSIWYG interface that enables users to create 3D objects without writing a single line of code.
In this tutorial, we're going to create and animate a logo for 'Tridiv Records', a fictional record label, using only HTML and CSS. The main visual for the logo is going to be created in 3D using Tridiv. Then we will add the typographic elements using regular HTML and CSS.
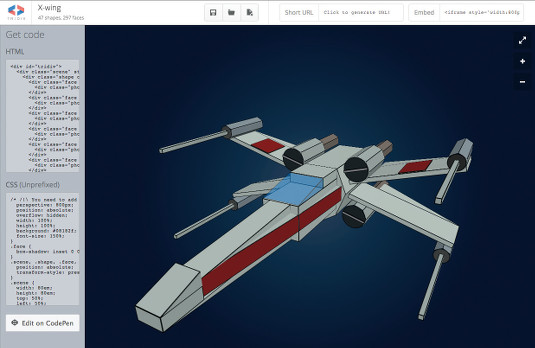
You can see the final animation and the code that generates it here.
Getting started
We're going to begin by creating the turntable in 3D using Tridiv. Head to tridiv.com and launch the app. You'll need to be using either Chrome, Safari, or Opera 15 (or later).
Before starting, it's important to understand the Tridiv interface. The main section of the editor is composed of four views: on the top left is the 3D view, providing a complete view of the scene. The other three views show it from the top, side and front. Using these three views, you can create, edit and move 3D shapes.
The horizontal toolbar is divided into two parts: the left part displays information relating to your document; the right part contains tools for creating and editing shapes. The Move selection and Edit selection buttons switch between the different editing modes.
The properties pane (the sidebar) displays document settings such as zoom and snap to grid, and the properties of the shape selected (size, position, rotation, colour, and so on). The unit used for dimensions and position is ems; the rotation angles are in degrees.
To avoid any confusion later in the tutorial, we're going to use the following shorthand:
w = width h = height d = depth diam = diameter x deg = rotation in the x-axis y deg = rotation in the y-axis z deg = rotation in the z-axis Creating the base of the turntable
Start by setting the zoom value to 200. To help draw the shapes, activate the snap to grid setting in the Document Settings section of the sidebar. Set the snap value to 0.125.
The base of the turntable is composed of a simple cuboid, so click the Add cuboid button in the top toolbar. You should see the cuboid appear in all four views in the editor.
Rename the shape to base using the name field of the properties pane (under Shape Properties). The name of the shape must be a valid CSS class name because it will be used in the code generated by the editor. We will use these class names later when animating the logo, so make sure that you name every new shape that you create properly.
Once the cuboid is named, make sure that it is selected in the top view (it should be highlighted in blue, with a circular ring of tools around it), then click the Edit button at the top of the ring to show the edit handles. Drag the control handles at the sides of the cuboid, until width and depth reach w=10 and d=8 in the Shape Properties.
Click on the shape inside the side view. This will show the editing handles in this view, allowing us to change its height. Adjust the height until it reaches h=2. You can also type values directly into the properties pane. To round off the corners of the cuboid, change the corners values in the properties pane to 1.75, then press the [Enter] key to apply the changes. You'll have something like this.
Creating the feet
For the turntable's feet, we are going to use cylinders. Add a cylinder, then change its diameter to diam=1.75 and its height to h=0.5. Click on the Move selection button in the top toolbar to show the draggable area on the shape. Move the cylinder under the base, placing it in one of the corners. (You may need to move it in the top, side and front views.)
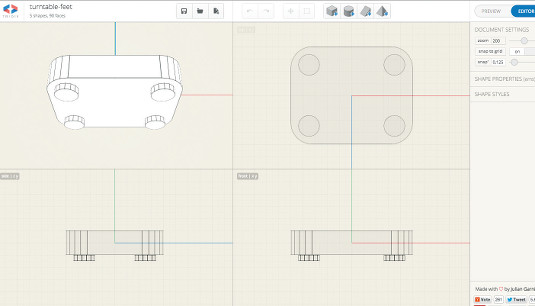
Duplicate the cylinder (press the Duplicate button in the circular ring of tools, or press the D key) and to move the new cylinder to another corner of the base. Repeat the process until all four feet are correctly positioned. Don't forget to name the cylinders (for example, feet-left-top, feet-right-top, feet-left-bottom, feet-left-top). When you've done that, the result should look like this.
We'll now look at creating the platter, disc, arm axis and button. The process for creating the next shapes is similar to that for the feet. Here are the dimensions used for the different cylinders:
platter: diam = 7; h = 0,5 disc: diam = 6.75; h = 0,25 button: diam = 1.5; h = 0,25 arm-axis-base: diam = 2.25; h = 0,25 arm-axis: diam = 1.375; h = 1 To refine the sides of the cylinders, you can increase the number of faces in each one, using the sides field in the properties pane. Don't add too many sides as this can negatively influence the global performance of the editor and the final animation. In this case, I'd advise you not to use more than 32 sides for the platter and the disc. You should have something like this.
The arm and the head
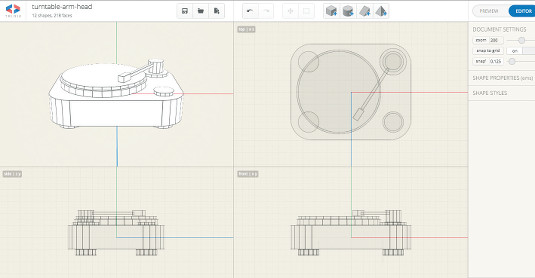
For the arm and the head of the turntable, we're going to use cuboids. For the arm, create a cuboid (w=0.25; h=0.25; d=4), then apply a rotation of -33° on the y-axis. For the head, create a cuboid (w=0.5; h=0.5; d=1), then apply a rotation of -33° on the y-axis. Align both shapes with the arm-axis cylinder. The result should look like this.
Colours and textures
We're almost done with the turntable. The final step is to assign colours and apply a texture to the vinyl (an image representing the surface of the record). To assign colours, select a shape and click on the colors field in the properties pane. Tridiv allows you to specify individual colours for each face of a shape, but, in this example, we need to use the all field to change the colour of all the faces. To do this, just enter a hex colour code in the field, then confirm by pressing Enter.
Here are the colours used in this example:
base: #0099FF feet, button, axis, arm and head: #F2EEE5 disc: #fa7f7a For the texture of the vinyl, the process is similar to assigning colours. Select the disc cylinder, then click on the images field in the properties pane. Paste the URL of the image you want to apply to the vinyl in the top field and confirm by pressing Enter. You can use an image of your own, or download the one used in this example.
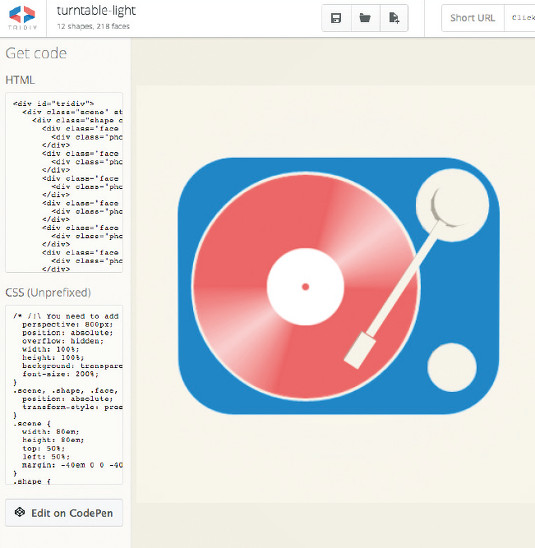
You should now have something that looks like this.
Rendering and exporting
Now that the turntable is done, we're going to work on the way in which it's rendered before exporting it. Click the Preview button on the top of the properties pane. Set the zoom value to 200 to display the turntable bigger. To remove the black borders of the shapes, go to the Borders section of the pane and set the opacity to 0. The result should look something like this.
We want the turntable to be lit from the top. To do this, rotate the scene in such a way that the top of the turntable is facing you. The base should look perfectly rectangular. Changing the light and dark values in the tridiv.com/d/4k6section of the properties pane will regenerate the shadows within the scene. Change the light value to 0.
The turntable is now ready to export!
Finishing the logo
We're ready to add the text to the logo and create the logo animation. Click the Edit on CodePen button on the bottom left of the Preview view to export the code to CodePen. It's important to note that the CSS code generated by Tridiv doesn't use vendor prefixes, so you will need to use tools like prefixr.com or leaverou.github.io/prefixfree in order to make the code functional in every browser. Start by closing the JavaScript pane, as we aren't going to use it. In the HTML pane, remove the style tag applied to the .scene div.
Expand the CSS pane and add the following code at the end:
.scene { transform: translateY(-140px) rotateX(-55deg); } Here, the translateY(-140px) moves the turntable 140px upwards, leaving room for the text beneath it. Then, the rotateX(-55deg) sets the vertical inclination of the turntable.
To add the text, you need to add a .title div right after the opening #tridiv div in the HTML pane. Inside, add two <spans> (.main-title and .sub-title), separated by <hr/>:
<div id="tridiv"> <div class="title"> <span class="main-title">TRIDIV</span> <hr/> <span class="sub-title">RECORDS</span> </div> … You then need to apply the correct fonts and styles. In the CSS pane, import the Open Sans font used in the logo, and add the basic styles for the text elements.
@import url(http://fonts.googleapis.com/css?family=Open+Sans:300); /* Text block centering + basic font styles */ title { position: absolute; top: 50%; left: 50%; margin: 0 0 0 -165px; width: 330px; height: 5em; font-family: 'Open Sans', sans-serif; font-weight: 300; font-size: 24px; text-align: center; letter-spacing: 1.5em; color: #0099FF; } title hr { border: 1px solid #fa7f7a; margin: .75em 0; } title span { display: block; } .main-title { font-size: 2.15em; } .sub-title { text-indent: .25em; } Voilà! Your logo is complete. It should look something like the image below. Once your 3D model is done, you can use the power of CSS to make it even better by adding styles, animations or mouse events: just treat the 3D model like any other HTML element.
Animate the logo
See an animation using the logo here. As the parts of the turntable 'fall' in, each of them share the same keyframe animation with different delays. The shapes have the top attribute set to 50%. To create the falling effect, we animate the top attribute from -400px to 50%:
@keyframes fall { 0% { top: -400px; } /* We start the animation positioning the shape to a height of 400px */ 100% { top: 50%; } /* then we end it on its original position */ } You can add this animation to all the shapes, as follows:
.shape { top: -400px; animation: fall 1s ease 0s forwards; } Set the top attribute to -400px and add a delay:
.platter { animation-delay: 1.05s; } .disc { animation-delay: 1.35s; } .button { animation-delay: 1.5s; } ... Create the final 'bounce' effect using the rotateX attribute:
90% { transform: translateY(-5em) rotateX(780deg) rotateY(0deg); } 95% { transform: translateY(-4em) rotateX(620deg) rotateY(0deg); } 100% { transform: translateY(-4.5em) rotateX(660deg) rotateY(0deg); } That's how we created this particular version, but remember: there are no limits!
Words: Julian Garnier
This article originally appeared in net magazine issue 248.
Related articles
Logo Design Online Free 3d
Source: https://www.creativebloq.com/netmag/create-animated-3d-logo-your-site-51411723
Posted by: wilcherinizing.blogspot.com
0 Response to "Logo Design Online Free 3d"
Post a Comment