Render Video From Marvelous Designer
In my previous article I've explained how to export an animation from DAZ Studio and import it into Marvelous Designer, where we've created and animated our garment. In this article I'll show you the reverse: exporting the garment with animation and import it into DAZ Studio for rendering.
Here's how this works in principle:
- export your garment animation from Marvelous Designer as OBJ Sequence
- import the sequence in DAZ Studio using Morph Loader Pro
- turn all those morphs into an animation
I've explained the whole process step by step in this video:
Exporting the garment animation from Marvelous Designer
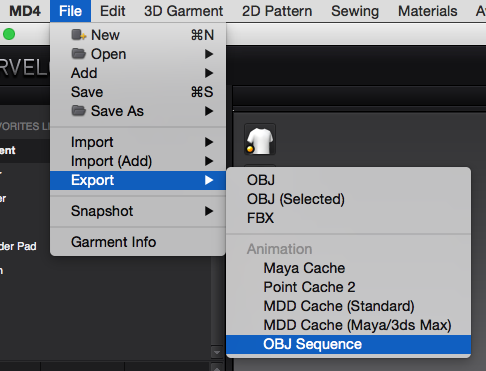
With the garment draped and animated, head over to File – Export – OBJ Sequence. This will create a standalone OBJ file for every frame of the animation.
An export dialogue will open, showing every part of your garment and your avatar in the list at the top. Deselect the avatar (in orange) so that only the garment will be exported.
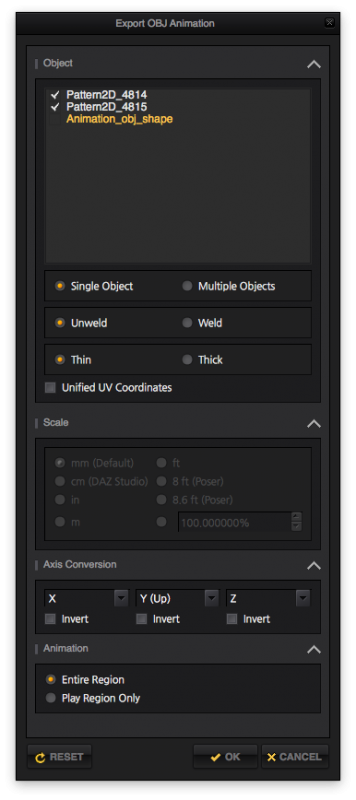
Sadly the avatar animation itself is not exportable: even with the avatar selected in the list, all we'll ever get is a single frame of it, together with an animated garment. It would certainly be a nice feature to have exportable avatars in a future release. For now let's deselect it to avoid trouble.
Notice that the scale section is greyed out in this dialogue: it's a bug in the current version of Marvelous Designer. The export scale is set to mm, which means the garment will come in ten times larger than we want it to be in DAZ Studio. We'll have to compensate on import. Make a mental note of this while this bug is present.
If your version is fixed, simply select DAZ Studio (cm). Make sure none of the axis are inverted.
Importing an OBJ Sequence into DAZ Studio
Back in DAZ Studio, head over to File – Import and select the first OBJ file in the sequence that was created by Marvelous Designer. You should have as many OBJ files as there are frames in your animation, and one MTL file describing the textures of each OBJ.
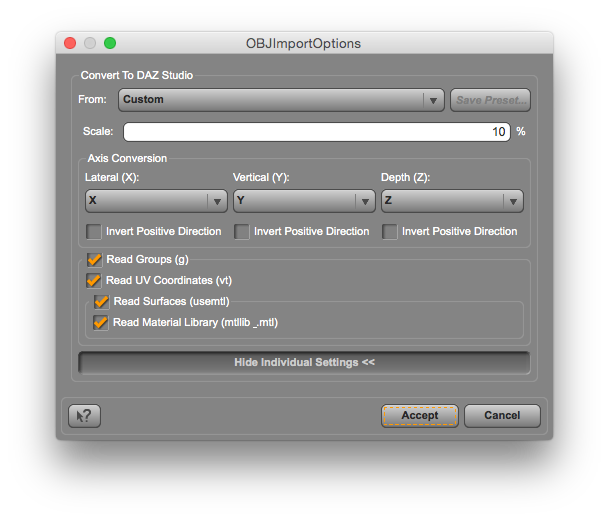
An import dialogue will appear. We'll have a chance to fix the scale here: enter 10% instead of 100% to bring the garment in at the correct size.
If you were able to export at DAZ Studio scale in Marvelous Designer then this isn't necessary of course. But until that bug is fixed, this is a feasible workaround.
Your garment will appear in the scene, complete with textures. Make sure to select it in the scene tab.
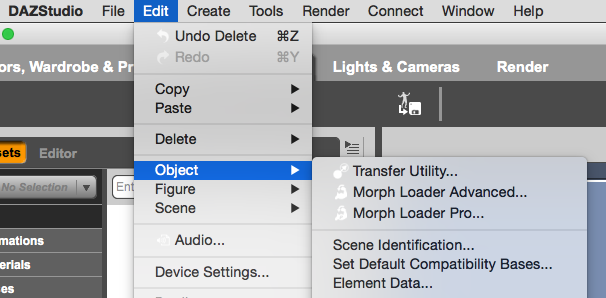
Now we'll import the rest of the OBJ sequence using Morph Loader: head over to Edit – Object – Morph Loader Pro.
In the following import dialogue we must also set the scale for all further objects that are part of the sequence. Select "show individual settings" and set it to 10%, matching our first object.
Under Choose Morph Files, select all other OBJ files in the sequence except for the first one. Use the SHIFT key to select multiple files. Hit Accept when you're done.
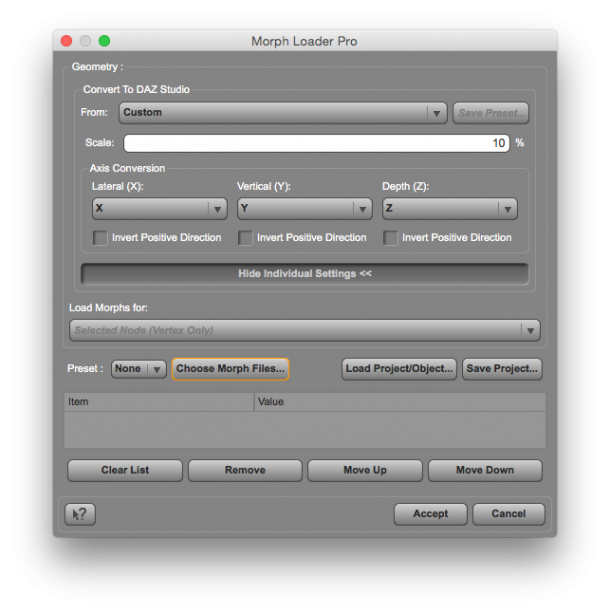
DAZ Studio will go to work and create a morph on our garment object for every frame of the animation. All we need to do now is switch on the correct morph on the correct frame of the animation and our garment will move just like in Marvelous Designer.
Creating the garment animation
Thanks to Marcus Wilm we can use a script which will do just that: it's called animMorph and it can be downloaded from the following URL:
-
http://www.sharecg.com/v/76477/gallery/8/Script/animMorph - https://gist.github.com/marcuswilm/c2305cd494d54b9aba80bf5f43d0f7bf
UnZIP the file and copy its contents into your DAZ Studio application directory, into a subfolder called "scripts". You'll also find a scripts subfolder in your content directory, you can also copy it there. Copy the text, then save it as a animMorph.dsa and copy it into your DAZ Studio Library's Script folder. You'll be able to execute it from there.
Now look for it in the Content Library tab – you won't find the script in the Smart Content pane. I've got it in both locations, which is why it's showing up twice.
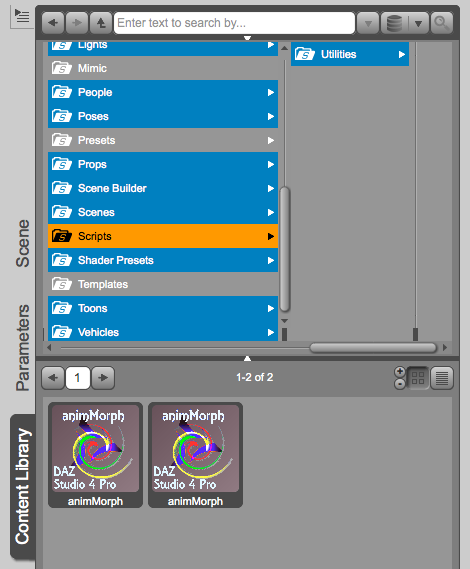
Make sure your garment object is selected in the Scene tab and execute the script with a double-click. You'll see the following window:
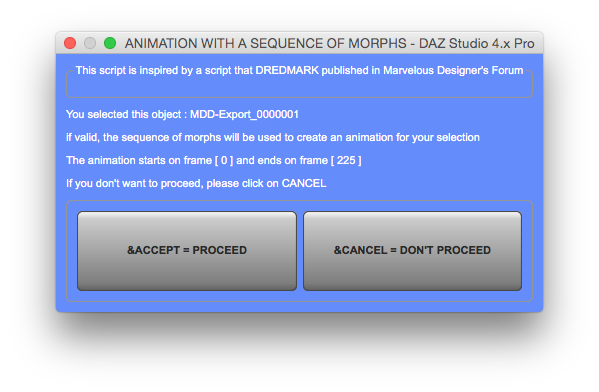
Hit Accept to turn every morph into a new frame of your animation. If all went well you can move the playhead and your garment should move in sync with your character.
I've explained how to create the actual animation and how to import it into Marvelous Designer in my previous article.
Render Video From Marvelous Designer
Source: https://www.versluis.com/2015/03/how-to-export-garment-animations-from-marvelous-designer-for-use-in-daz-studio/
Posted by: wilcherinizing.blogspot.com

0 Response to "Render Video From Marvelous Designer"
Post a Comment